Introduction of Non-Contact 3D Measuring Machine
- Posted by KMI
- on May, 22, 2020
- in kawakiman_J
- Blog No Comments.
Non-contact 3D measuring request is at your service.
Are you fully satisfied with your company’s measuring machine?
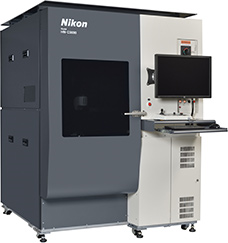
Non-contact 3D measuring machine developed and sold by Nikon Corporation, the manufacturer of an optical equipment, has an overwhelming world share in camera industry, is introduced to our facility.
This non-contact system measuring machine is rare, uses a laser scanner, measures wherever the laser reaches. 3D measuring machine’s use is not limited, measures the object of any shapes and forms.
<Benefits of non-contact measurement>
All data measured by 3D measuring machine is archived, that makes it possible to measure any part afterwards.
Difference analysis of good and defective products, pre and after manufacturing.
Mold shape or prove scratch do not remain after measuring, not a single problem selling as a good product after the measurement.
For example, on occasion of comparing good and defective products, the same part of inspection data can be supposedly displayed, so it can be used for a tool of analyzing failure cause. Also, we use it to verify and analyze blade edging timing and displacement interval by comparing deterioration condition of tools.
Now, 3D printer is taking a big part in manufacturing industry, measurement of any kinds of materials and structures is our expertise. Please feel free to contact us.

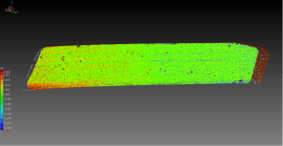
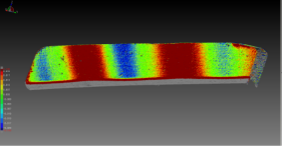
【Sample Image】convexo-concave comparison of gear tooth surface shapes
~Image superposing a good product and a good product~

(Entire surface is green, it shows no dimensional difference)
~Image superposing a good product and a defective product~

(Green is standard, and red and blue for + ― direction, color strength for dimensions)
*Data is quoted from Nikon Corporation document
【Contacts】
Email: stc@kawasaki-kikai.co.jp
Person in Charge: Imai, Sales Planning Division
We sincerely look forward to hearing from you.
Recent Posts
- At the Start of 2025 2025-01-16
- We are a member of a gear research institution “Gear Lab” at Ohio State University. 2022-08-24
- Re-certification of JIS Q9100/ ISO9001 2022-01-25
- Our company was broadcasted on Vietnam National Television (VOV). 2021-11-17
- Acquired KES Environmental Management System Standard Step 2. 2020-10-13
- Kyoto Prefectural Toba High School Carrier Guidance ~Message to Students~ 2020-09-14
- Introduction of Non-Contact 3D Measuring Machine 2020-05-22
- Declaration of Healthy Organization 2020-03-06
- French Business Award 2020 2020-03-02
- F4 Driver Kakunoshin Ohta Took a Second Place. 2019-09-20
